Android 实战简易教程-第十枪(画廊组件 Gallery 实用研究)
Gallery 组件用于拖拽浏览图片,下面我们就来看一下如何实现。
一、实现 Gallery
1.布局文件很简单:
<?xml version="1.0" encoding="utf-8"?>
<LinearLayout xmlns:android="http://schemas.android.com/apk/res/android"
    android:id="@+id/MyLayout"
    android:layout_width="match_parent"
    android:layout_height="match_parent"
    android:background="#FFFFFF"
    android:orientation="vertical" >

    <Gallery
        android:id="@+id/myGallery"
        android:gravity="center_vertical"
        android:layout_width="match_parent"
        android:layout_height="wrap_content" ></Gallery>

</LinearLayout>
2.自定义适配器类,可以直接覆写 BaseAdapter 类中的几个方法。
package org.yayun.demo;

import android.content.Context;
import android.view.View;
import android.view.ViewGroup;
import android.widget.BaseAdapter;
import android.widget.Gallery;
import android.widget.ImageView;
import android.widget.Gallery.LayoutParams;

public class ImageGalleryAdapter extends BaseAdapter {
    private Context context;
    private int imgRes[] = new int[] { R.drawable.ispic_a, R.drawable.ispic_b,
            R.drawable.ispic_c, R.drawable.ispic_d, R.drawable.ispic_e, };

    public ImageGalleryAdapter(Context c) {//构造方法,用于获取上下文对象
        this.context = c;
    }

    public int getCount() {

        return imgRes.length;
    }

    public Object getItem(int position) {
        return imgRes[position];
    }

    public long getItemId(int position) {
        return imgRes[position];
    }

    public View getView(int position, View convertView, ViewGroup parent) {
        ImageView img = new ImageView(this.context);
        img.setBackgroundColor(0xFFFFFFFF);
        img.setImageResource(this.imgRes[position]);//设置资源
        img.setScaleType(ImageView.ScaleType.CENTER);//居中显示
        img.setLayoutParams(new Gallery.LayoutParams(LayoutParams.WRAP_CONTENT,
                LayoutParams.WRAP_CONTENT));
        return img;
    }

}
3.MainActivity.java:
package org.yayun.demo;
import android.app.Activity;
import android.os.Bundle;
import android.view.View;
import android.widget.AdapterView;
import android.widget.Toast;
import android.widget.AdapterView.OnItemClickListener;
import android.widget.Gallery;
public class MainActivity extends Activity {
private Gallery gallery;
public void onCreate(Bundle savedInstanceState) {
super.onCreate(savedInstanceState); // 生命周期方法
super.setContentView(R.layout.main); // 设置要使用的布局管理器
gallery = (Gallery) findViewById(R.id.myGallery);
gallery.setAdapter(new ImageGalleryAdapter(this));
gallery.setOnItemClickListener(new OnItemClickListener() {
public void onItemClick(AdapterView<?> parent, View view,
int position, long id) {
Toast.makeText(MainActivity.this,
"您选择了第" + String.valueOf(position + 1) + "张图片",
Toast.LENGTH_SHORT).show();
}
});
}
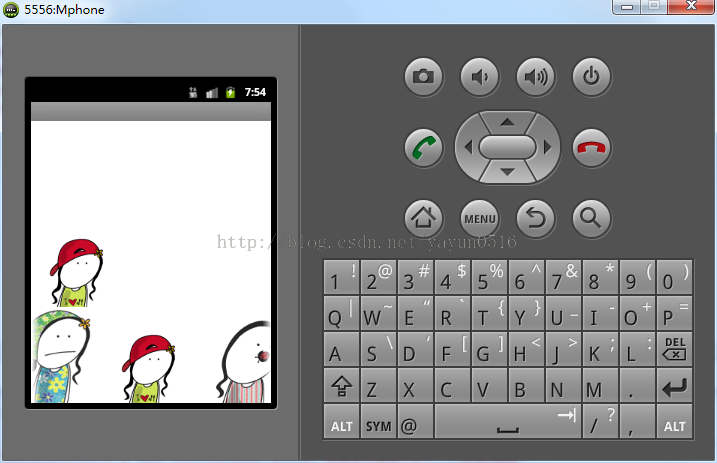
}4.运行实例如下:

二、Gallery 和 ImageSwitcher 结合
这时的 Gallery 我们用 SimpleAdapter 类完成。
1.布局文件:
<?xml version="1.0" encoding="utf-8"?>
<LinearLayout xmlns:android="http://schemas.android.com/apk/res/android"
    android:id="@+id/MyLayout"
    android:layout_width="match_parent"
    android:layout_height="match_parent"
    android:background="#FFFFFF"
    android:gravity="bottom"
    android:orientation="vertical" >

    <ImageSwitcher
        android:id="@+id/imageSwitcher"
        android:layout_width="fill_parent"
        android:layout_height="wrap_content" >
    </ImageSwitcher>

    <Gallery
        android:id="@+id/gallery"
        android:layout_width="match_parent"
        android:layout_height="wrap_content"
        android:gravity="center_vertical"
        android:spacing="5dp" />

</LinearLayout>
2.定义显示模板:
<?xml version="1.0" encoding="utf-8"?>
<LinearLayout xmlns:android="http://schemas.android.com/apk/res/android"
    android:layout_width="wrap_content"
    android:layout_height="wrap_content"
    android:background="#FFFFFF"
    android:orientation="horizontal" >

    <ImageView
        android:id="@+id/img"
        android:layout_width="wrap_content"
        android:layout_height="wrap_content"
        android:scaleType="center" />

</LinearLayout>
3.MainActivity.java 程序:
package org.yayun.demo;

import java.lang.reflect.Field;
import java.util.ArrayList;
import java.util.HashMap;
import java.util.List;
import java.util.Map;

import android.app.Activity;
import android.os.Bundle;
import android.view.View;
import android.widget.AdapterView;
import android.widget.ImageSwitcher;
import android.widget.ImageView;
import android.widget.SimpleAdapter;
import android.widget.Toast;
import android.widget.AdapterView.OnItemClickListener;
import android.widget.Gallery.LayoutParams;
import android.widget.Gallery;
import android.widget.ViewSwitcher.ViewFactory;

public class MainActivity extends Activity {
    private Gallery gallery;
    private List<Map<String, Integer>> list = new ArrayList<Map<String, Integer>>();
    private SimpleAdapter simpleAdapter;
    private ImageSwitcher imageSwitcher;

    public void onCreate(Bundle savedInstanceState) {
        super.onCreate(savedInstanceState); // 生命周期方法
        super.setContentView(R.layout.main); // 设置要使用的布局管理器
        initAdapter();
        gallery = (Gallery) findViewById(R.id.gallery);
        imageSwitcher = (ImageSwitcher) findViewById(R.id.imageSwitcher);
        imageSwitcher.setFactory(new ViewFactory() {

            public View makeView() {
                ImageView imageView = new ImageView(MainActivity.this);
                imageView.setBackgroundColor(0xFFFFFFFF);
                imageView.setScaleType(ImageView.ScaleType.CENTER);
                imageView.setLayoutParams(new ImageSwitcher.LayoutParams(
                        LayoutParams.WRAP_CONTENT, LayoutParams.WRAP_CONTENT));
                return imageView;
            }
        });
        gallery.setAdapter(simpleAdapter);
        gallery.setOnItemClickListener(new OnItemClickListener() {

            public void onItemClick(AdapterView<?> parent, View view,
                    int position, long id) {
                Map<String, Integer> map = (Map<String, Integer>) MainActivity.this.simpleAdapter
                        .getItem(position);// 取出map
                MainActivity.this.imageSwitcher.setImageResource(map.get("img"));// 设置显示图片

            }
        });
    }

    private void initAdapter() {
        Field[] fields = R.drawable.class.getDeclaredFields();// Java反射机制获取所有资源图片
        for (int i = 0; i < fields.length; i++) {
            if (fields[i].getName().startsWith("ispic_")) {// 判断开头
                Map<String, Integer> map = new HashMap<String, Integer>();
                try {
                    map.put("img", fields[i].getInt(R.drawable.class));
                } catch (IllegalArgumentException e) {
                    // TODO Auto-generated catch block
                    e.printStackTrace();
                } catch (IllegalAccessException e) {
                    // TODO Auto-generated catch block
                    e.printStackTrace();
                }
                this.list.add(map);
            }
        }
        simpleAdapter = new SimpleAdapter(this, this.list,
                R.layout.grid_layout, new String[] { "img" },
                new int[] { R.id.img });

    }
}
4.运行实例:
上一篇: Android 实战简易...