NOOBS
今天换个玩法,不继续深入探索 Raspbian 系统了,研究一下官网推荐的另一种安装方法 NOOBS。
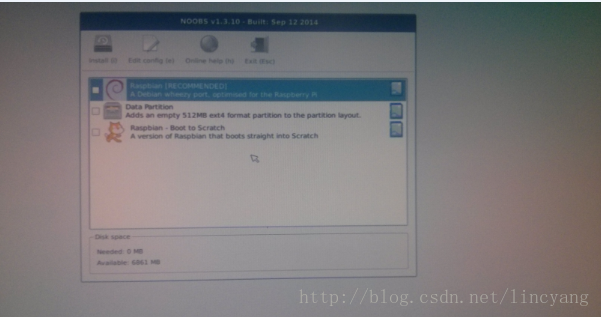
那么什么是 NOOBS 呢?它是专为 Raspberry pi 打造的简单易用的图形界面的操作系统管理工具。全称为:New Out Of the Box Software。
官方截图如下:

本工具的初衷就是简化 Raspberry pi 安装系统的繁琐,因为 Raspberry pi 的板子买来是不带系统的,我们需要额外购买 SDCard 来安装系统。对很多新手来说,命令行的东西肯定是没有图形界面来得简单易懂。正是由于每个 sdcard 上面代表着安装好的系统,我们可以通过多买几个 sdcard 就可以持续性的体验不同的系统,只需通过换个 sdcard 搞定,真是特别方便。下面来说说我是如果在另一张 8G 卡用 NOOBS 安装系统 Raspbian 的。
第一步,下载 NOOBS
官网链接,记得自己是在 Ubuntu 下用 Firefox 浏览器下载的,可以断点续传。
第二步,格式化 SDCard
如果你的 SDCard 本来就是 FAT32 文件系统,那么跳过这一步。不要被这一步吓到,如果不用格式化,那么NOOBS安装只需要三步:下载、解压、在 Raspberry pi 上启动。
Linux 下将 SDCard 格式化成 Fat32 文件系统。用 fdisk 命令,需要 root 权限,或者 sudo。插上 SDCard 卡,执行如下命令:
#fdisk -l
Disk /dev/sdb: 8054 MB, 8054112256 bytes
49 heads, 29 sectors/track, 11070 cylinders, total 15730688 sectors
Units = sectors of 1 * 512 = 512 bytes
Sector size (logical/physical): 512 bytes / 512 bytes
I/O size (minimum/optimal): 512 bytes / 512 bytes
Disk identifier: 0x00000000

   Device Boot      Start         End      Blocks   Id  System
/dev/sdb1            8192    15730687     7861248    b  W95 FAT32
看来我的 8G 卡现在已经是 FAT32 系统了,而且就这一个分区。不要紧,过程我还是要执行一遍。
#fdisk /dev/sdb1
Command (m for help): d
No partition is defined yet!

Command (m for help): p

Disk /dev/sdb1: 8049 MB, 8049917952 bytes
248 heads, 62 sectors/track, 1022 cylinders, total 15722496 sectors
Units = sectors of 1 * 512 = 512 bytes
Sector size (logical/physical): 512 bytes / 512 bytes
I/O size (minimum/optimal): 512 bytes / 512 bytes
Disk identifier: 0x00000000

     Device Boot      Start         End      Blocks   Id  System

Command (m for help): n
Partition type:
   p   primary (0 primary, 0 extended, 4 free)
   e   extended
Select (default p): p
Partition number (1-4, default 1): 1
First sector (2048-15722495, default 2048):
Using default value 2048
Last sector, +sectors or +size{K,M,G} (2048-15722495, default 15722495):
Using default value 15722495
Tips:回车(Enter)键选择默认项。
Tips:Enter is means you select default option.
上面创建了一个主分区,1 号分区。并且设置了启动和结束的扇区值。我们再来看看创建的情况:
Command (m for help): p

Disk /dev/sdb1: 8049 MB, 8049917952 bytes
248 heads, 62 sectors/track, 1022 cylinders, total 15722496 sectors
Units = sectors of 1 * 512 = 512 bytes
Sector size (logical/physical): 512 bytes / 512 bytes
I/O size (minimum/optimal): 512 bytes / 512 bytes
Disk identifier: 0x00000000

     Device Boot      Start         End      Blocks   Id  System
/dev/sdb1p1            2048    15722495     7860224   83  Linux
好的,我们的分区类型是 linux,下面我们再把它转换成 FAT32。
Command (m for help): t
Selected partition 1
Hex code (type L to list codes): l //attention!This is L! Not number 1.

 0  Empty           24  NEC DOS         81  Minix / old Lin bf  Solaris
 1  FAT12           27  Hidden NTFS Win 82  Linux swap / So c1  DRDOS/sec (FAT-
 2  XENIX root      39  Plan 9          83  Linux           c4  DRDOS/sec (FAT-
 3  XENIX usr       3c  PartitionMagic  84  OS/2 hidden C:  c6  DRDOS/sec (FAT-
 4  FAT16 <32M      40  Venix 80286     85  Linux extended  c7  Syrinx
 5  Extended        41  PPC PReP Boot   86  NTFS volume set da  Non-FS data
 6  FAT16           42  SFS             87  NTFS volume set db  CP/M / CTOS / .
 7  HPFS/NTFS/exFAT 4d  QNX4.x          88  Linux plaintext de  Dell Utility
 8  AIX             4e  QNX4.x 2nd part 8e  Linux LVM       df  BootIt
 9  AIX bootable    4f  QNX4.x 3rd part 93  Amoeba          e1  DOS access
 a  OS/2 Boot Manag 50  OnTrack DM      94  Amoeba BBT      e3  DOS R/O
 b  W95 FAT32       51  OnTrack DM6 Aux 9f  BSD/OS          e4  SpeedStor
 c  W95 FAT32 (LBA) 52  CP/M            a0  IBM Thinkpad hi eb  BeOS fs
 e  W95 FAT16 (LBA) 53  OnTrack DM6 Aux a5  FreeBSD         ee  GPT
 f  W95 Ext'd (LBA) 54  OnTrackDM6      a6  OpenBSD         ef  EFI (FAT-12/16/
10  OPUS            55  EZ-Drive        a7  NeXTSTEP        f0  Linux/PA-RISC b
11  Hidden FAT12    56  Golden Bow      a8  Darwin UFS      f1  SpeedStor
12  Compaq diagnost 5c  Priam Edisk     a9  NetBSD          f4  SpeedStor
14  Hidden FAT16 <3 61  SpeedStor       ab  Darwin boot     f2  DOS secondary
16  Hidden FAT16    63  GNU HURD or Sys af  HFS / HFS+      fb  VMware VMFS
17  Hidden HPFS/NTF 64  Novell Netware  b7  BSDI fs         fc  VMware VMKCORE
18  AST SmartSleep  65  Novell Netware  b8  BSDI swap       fd  Linux raid auto
1b  Hidden W95 FAT3 70  DiskSecure Mult bb  Boot Wizard hid fe  LANstep
1c  Hidden W95 FAT3 75  PC/IX           be  Solaris boot    ff  BBT
1e  Hidden W95 FAT1 80  Old Minix
Hex code (type L to list codes): b
Changed system type of partition 1 to b (W95 FAT32)

Command (m for help): p

Disk /dev/sdb1: 8049 MB, 8049917952 bytes
248 heads, 62 sectors/track, 1022 cylinders, total 15722496 sectors
Units = sectors of 1 * 512 = 512 bytes
Sector size (logical/physical): 512 bytes / 512 bytes
I/O size (minimum/optimal): 512 bytes / 512 bytes
Disk identifier: 0x00000000

     Device Boot      Start         End      Blocks   Id  System
/dev/sdb1p1            2048    15722495     7860224    b  W95 FAT32
此时需要将新的分区写入到 sdcard,使用 w 命令:
Command (m for help): w
The partition table has been altered!

Calling ioctl() to re-read partition table.

WARNING: Re-reading the partition table failed with error 22: Invalid argument.
The kernel still uses the old table. The new table will be used at
the next reboot or after you run partprobe(8) or kpartx(8)

WARNING: If you have created or modified any DOS 6.x
partitions, please see the fdisk manual page for additional
information.
Syncing disks.

mkfs.vfat /dev/sdb1
mkfs.vfat 3.0.12 (29 Oct 2011)
mkfs.vfat: /dev/sdb1 contains a mounted file system.
值得注意的是,我上面的 format 操作貌似没有成功。因为在 sdcard 中还可以看到原有文件,也许是因为写保护?还是什么别的原因?好像我的一系列操作都没有成功似的。
第三步,将 NOOBS 文件解压到 SDCard
如果 SDCard 本来就是 FAT32 系统,那么直接就可以做这一步,这也就是用 NOOBS 工具安装系统的方便之所在。
解压过程:此时我在 sdcard 的目录下,直接执行 unzip。
unzip ~/raspberrypi/NOOBS_v1_3_10.zip
Archive: ~/raspberrypi/NOOBS_v1_3_10.zip
inflating: BUILD-DATA
inflating: INSTRUCTIONS-README.txt
extracting: RECOVERY_FILES_DO_NOT_EDIT
inflating: bootcode.bin
creating: defaults/
creating: defaults/slides/
inflating: defaults/slides/A.png
creating: os/
creating: os/Raspbian/
inflating: os/Raspbian/root.tar.xz
inflating: os/Raspbian/boot.tar.xz
inflating: os/Raspbian/partition_setup.sh
extracting: os/Raspbian/Raspbian.png
creating: os/Raspbian/slides_vga/
inflating: os/Raspbian/slides_vga/G.png
inflating: os/Raspbian/slides_vga/B.png
inflating: os/Raspbian/slides_vga/C.png
inflating: os/Raspbian/slides_vga/D.png
inflating: os/Raspbian/slides_vga/E.png
inflating: os/Raspbian/slides_vga/F.png
inflating: os/Raspbian/slides_vga/A.png
inflating: os/Raspbian/partitions.json
inflating: os/Raspbian/flavours.json
extracting: os/Raspbian/Raspbian_-_Boot_to_Scratch.png
inflating: os/Raspbian/os.json
inflating: os/Raspbian/release_notes.txt
creating: os/Data_Partition/
extracting: os/Data_Partition/Data_Partition.png
inflating: os/Data_Partition/partitions.json
inflating: os/Data_Partition/os.json
extracting: os/Data_Partition/data.tar.xz
inflating: recovery.cmdline
inflating: recovery.elf
inflating: recovery.img
inflating: recovery.rfs
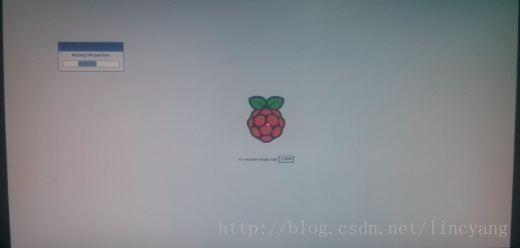
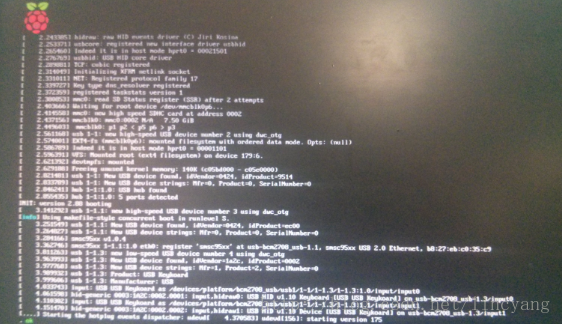
inflating: riscos-boot.bin 第四步,启动
现在可以把 SDCard 从电脑上退下来,插到板子上,加电启动。如下图所示:
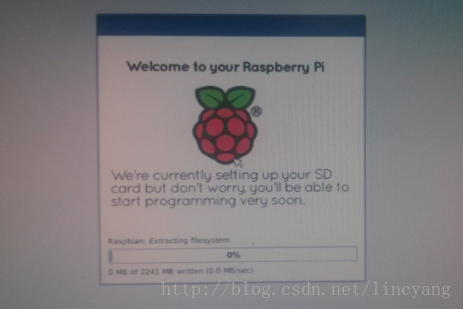
在安装中,拷贝速度是 1.4MB/s,明显比直接用 dd 命令将 img 拷贝到 sdcard 中慢。
经过漫长的安装过程,终于成功了。启动画面与上一季完全一样。
参考: 官方安装文档:http://www.raspberrypi.org/documentation/installation/noobs.md