集群安装【RAC1】
Oracle 登入 rac1 进行上传,解压安装 p13390677_112040_Linux-x86-64_1of7.zip、p13390677_112040_Linux-x86-64_2of7.zip、p13390677_112040_Linux-x86-64_3of7.zip 到 /media 下,并解压。
RAC1 # cd /media
RAC1 #mkdir crs_install
RAC1 #mkdir db_install
RAC1 # ls

RAC1 #cd crs_install
RAC1 #unzip /media/p13390677_112040_Linux-x86-64_3of7.zip
RAC1 #cd db_install
RAC1 #unzip /media/p13390677_112040_Linux-x86-64_1of7.zip
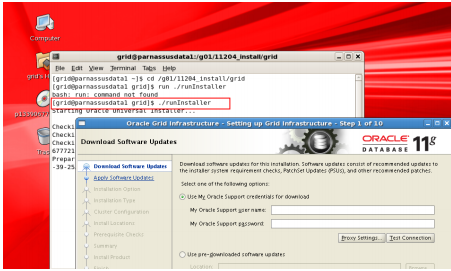
RAC1 #unzip /media/p13390677_112040_Linux-x86-64_2of7.zip开始安装:找到 /media/crs_install/grid下
./runInstaller下一步:Next
1) skip software update, Next

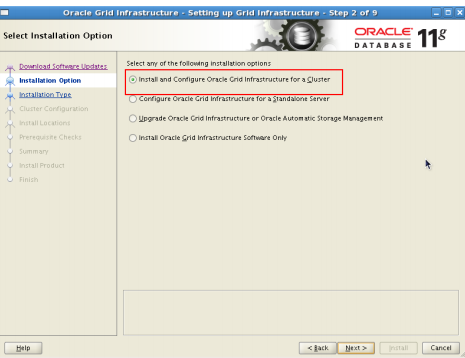
2) 选择'Install and Configure Oracle Grid Infrastructure for a Cluster'
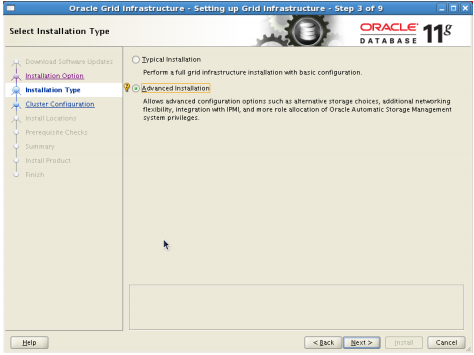
3) 选 'Advanced Installation'
4) 选择语言: English

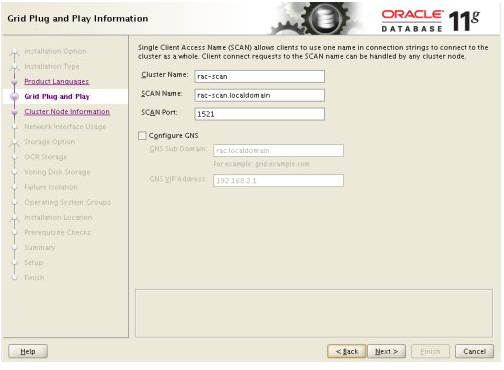
5) Enter cluster information and uncheck the "Configure GNS" option, then click the "Next" button
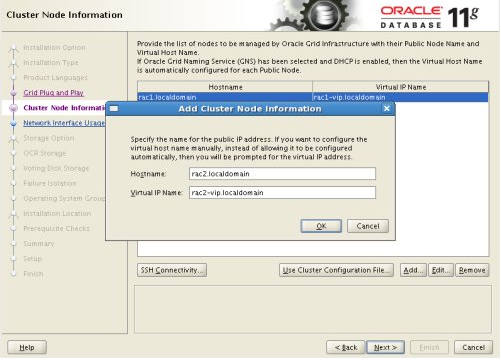
6)On the "Specify Node Information" screen, click the "Add" button

7)Enter the details of the second node in the cluster, then click the "OK" button
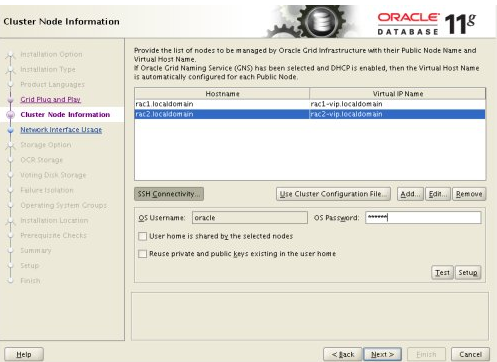
8)Click the "SSH Connectivity..." button and enter the password for the "oracle" user. Click the "Setup" button to to configure SSH connectivity, and the "Test" button to test it once it is complete. Click the "Next" button
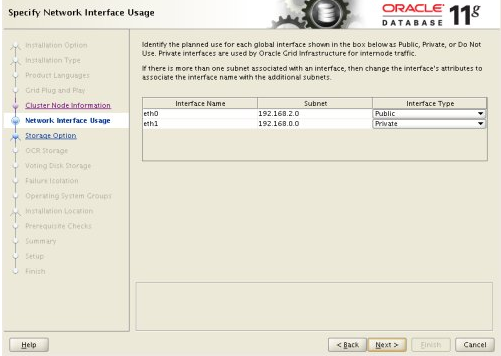
9)Check the public and private networks are specified correctly, then click the "Next" button
10)Select the "Shared File System" option, then click the "Next" button

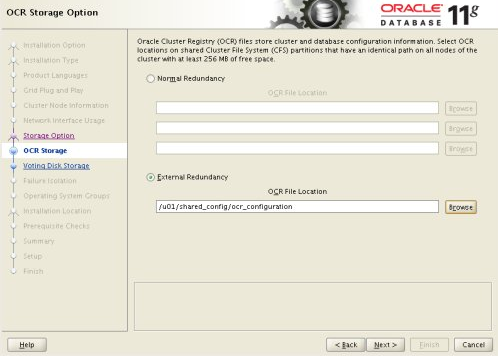
11)Select the required level of redundancy and enter the OCR File Location(s), then click the "Next" button
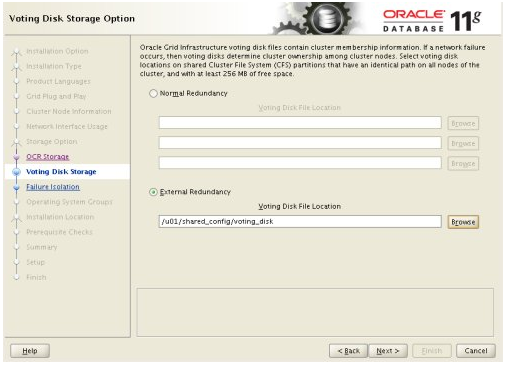
12)Select the required level of redundancy and enter the Voting Disk File Location(s), then click the "Next" button
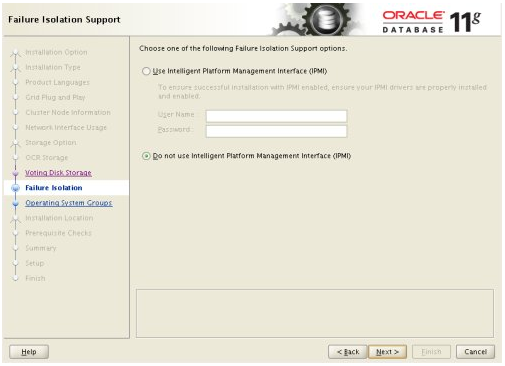
13)Accept the default failure isolation support by clicking the "Next" button
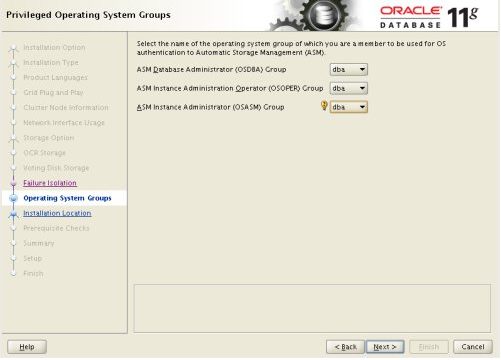
14)Select the preferred OS groups for each option, then click the "Next" button. Click the "Yes" button on the subsequent message dialog
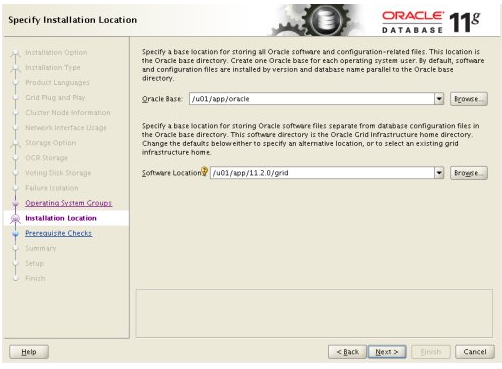
15)Enter "/u01/app/oracle" as the Oracle Base and "/u01/app/11.2.0/grid" as the software location, then click the "Next" button
16) Accept the default inventory directory by clicking the "Next" button

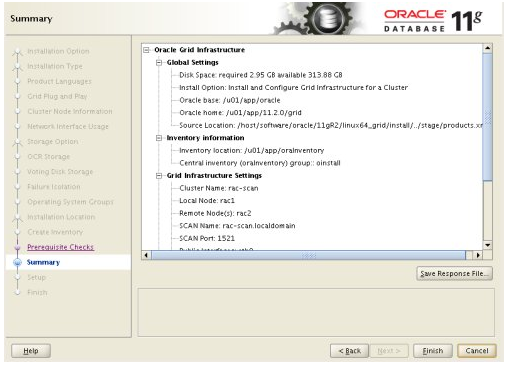
17) Wait while the prerequisite checks complete. If you have any issues, either fix them or check the "Ignore All" checkbox and click the "Next" button. If there are no issues, you will move directly to the summary screen. If you are happy with the summary information, click the "Finish" button
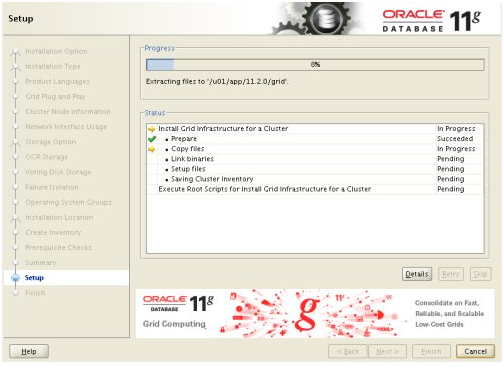
18) Wait while the setup takes place
19) When prompted, run the configuration scripts on each node
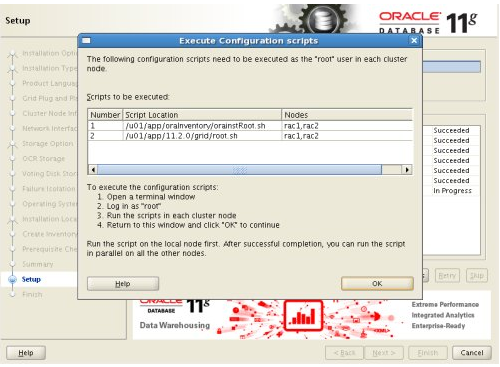
The output from the "orainstRoot.sh" file should look something like that listed below
# cd /u01/app/oraInventory
# ./orainstRoot.sh
Changing permissions of /u01/app/oraInventory.
Adding read,write permissions for group.
Removing read,write,execute permissions for world.
Changing groupname of /u01/app/oraInventory to oinstall.
The execution of the script is complete.
The output of the root.sh will vary a little depending on the node it is run on. Example output can be seen here (Node1,Node2).
20) Once the scripts have completed, return to the "Execute Configuration Scripts" screen on RAC1 and click the "OK" button.
21) Wait for the configuration assistants to complete

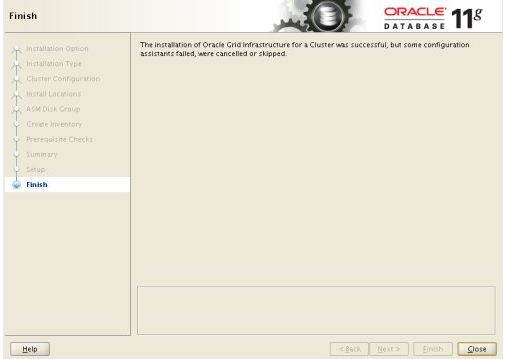
22) Provided this is the only error, it is safe to ignore this and continue by clicking the "Next" button.Click the "Close" button to exit the installer