Forms in HTML5
Chapter 9
So far, we've managed to create a few interesting versions of the website. We haven't yet covered the forms for which users can enter data. Forms are used across the Internet everywhere; search engines like Google or Bing, Facebook status fields, or Gmail email editors allow you to type or send information.
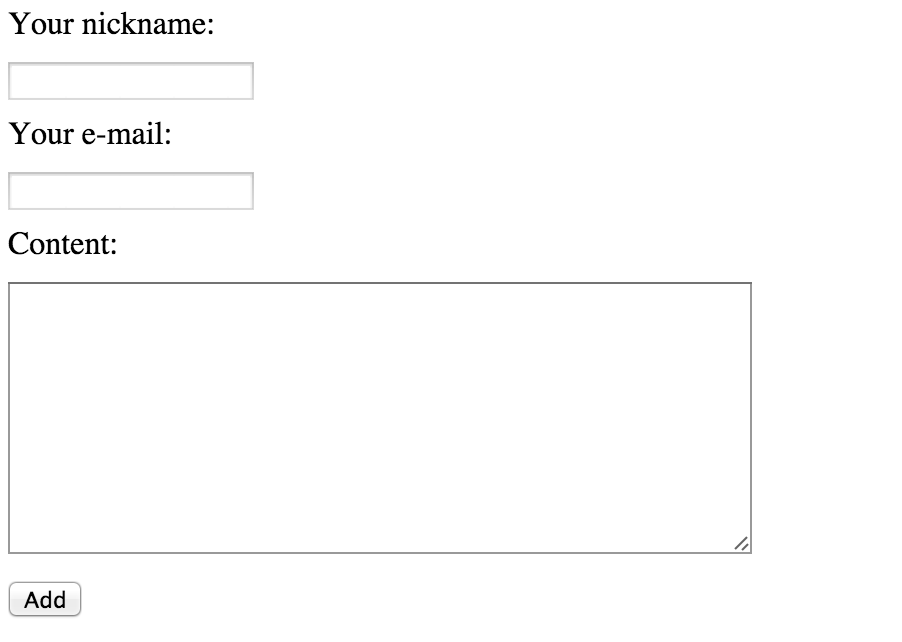
Let's make a simple form to allow users comment on our article. We want the form to look something like the following image:

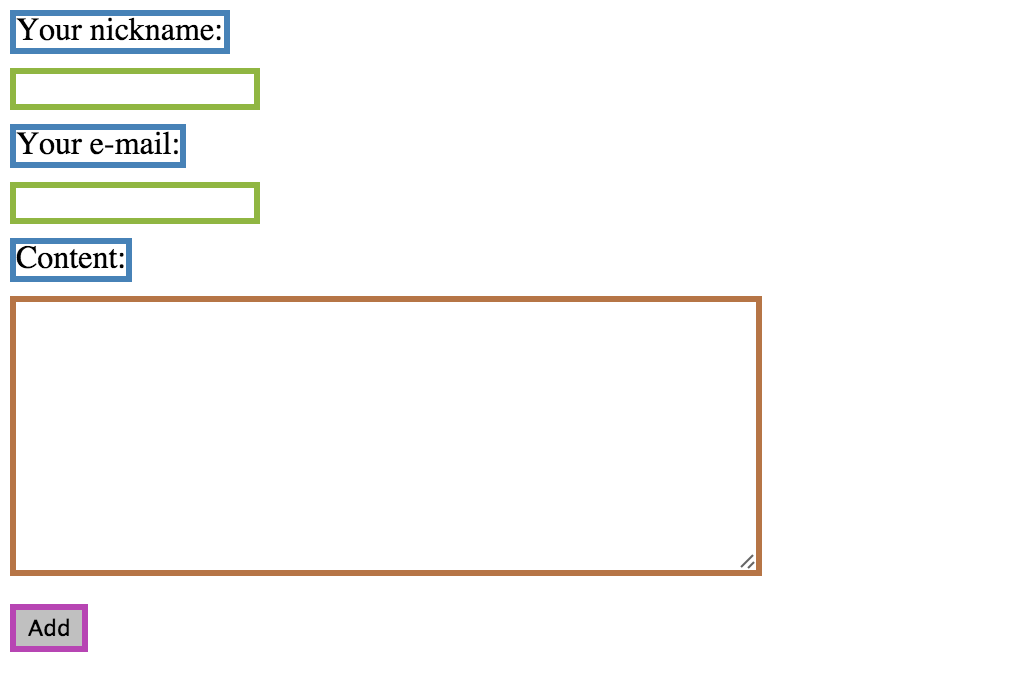
Let's now select the individual components that make up the form. We will use the same selection colors for elements that perform a similar function:

As you can see, green indicates names or description for each of the fields. Orange elements show places where you can enter one-liner text. The blue area lets you enter longer chunks of text, and purple is used for a button to send the form. For each group, we'll use the same tag.
For names we'll use <label>. For shorter fields – <input type="text">. The longer texts will use <textarea>. Buttons are made with <input type="submit">. These are the most popular elements of HTML, that are used to build forms on websites. As always, we start with a blank HTML template page and add then add more elements.
<!DOCTYPE html>
<html lang="en">
  <head>
      <meta charset="utf-8">
      <title>Form</title>
      <link rel="stylesheet" href="main.css">
  </head>
  <body>
  </body>
</html>
We need to use the appropriate tag that tells the browser, "Hey, the form starts here!" This is very similar to the tag <article> for indicating where an article element starts). In HTML, we use the <form> tag for indicating a form element
<!DOCTYPE html>
<html lang="en">
  <head>
      <meta charset="utf-8">
      <title>Form</title>
      <link rel="stylesheet" href="main.css">
  </head>
  <body>
    <form>
    </form>
  </body>
</html>
Now, we want to add the first description name: "Your nickname." From here on, we'll examine the code fragments that are contained under <form>, because the rest of the HTML is already well known to you.
<form>
  <label for="nickname">Your nickname:</label>
  <input type="text" id="nickname" name="nickname">
</form>
Here we have two <label> elements which give the description name, and the <input> elements for text input. The <input> tag has three attributes: input type with a "text" value, name with "nickname" value and id also with "nickname" value. The "type" attribute's value means that it's a short text field.
The field below appears for these types of fields:

You'll use <input type="text"> in your code to indicate that a user can type within the field. Note that text fields can be styled using CSS. We can change its border, width, or distance between any text and a text field border. A rough example is shown below:

The "name" attribute is used to name each of the fields. This is useful when you send the form to the server. It helps to identify which value comes from which field.
Note also the correlation between the value of the "id" and the value of "for" attribute in <label>:
<label for="nickname">Your nickname:</label>
<input type="text" id="nickname" id="nickname" name="nickname">
In the "for" attribute, you should use the id of the field described by the <label> element.
Let's make another form, now for the "email" field.
<form>
  <label for="nickname">Your nickname:</label>
  <input type="text" id="nickname" name="nickname">
  <label for="user-email">Your e-mail:</label>
  <input type="email" id="user-email" name="user-email">
</form>
The only difference here is that the "type" attribute has an "email" value. The meaning is, of course, so that the user can enter their email. Note that anything typed within the "email" field will have to be validated as a correct e-mail address. If it's not a valid email, the browser will display an error message and will not send the form.
Another field we need to add is a place for the comment. For longer texts, we use the <textarea> tag:
<form>
  <label for="nickname">Your nickname:</label>
  <input type="text" id="nickname" name="nickname">
  <label for="user-email">Your e-mail:</label>
  <input type="email" id="user-email" name="user-email">
  <label for="content">Content:</label>
  <textarea rows="10" cols="50" id="content"  name="content" ></textarea>
</form>
Note that we used two new attributes: rows and cols. The "rows" attribute is used for the number of text lines that can be entered into the field until a scrollbar appears. "cols" is used for the number of character in each line. Try changing the values for yourself and see how the entire field expands or contracts accordingly.
The last thing we need to add is a button for sending the form.
<form>
  <label for="nickname">Your nickname:</label>
  <input type="text" id="nickname" name="nickname">
  <label for="user-email">Your e-mail:</label>
  <input type="email" id="user-email" name="user-email">
  <label for="content">Content:</label>
  <textarea rows="10" cols="50" id="content"  name="content" ></textarea>
  <input type="submit" value="Add">
</form>
The element <input> has the attribute type equal to submit. Whatever is typed into the value attribute will display as text on our website button.
Our code for the form now looks like this:
<!DOCTYPE html>
<html lang="en">
  <head>
      <meta charset="utf-8">
      <title>Formularz</title>
      <link rel="stylesheet" href="main.css">
  </head>
  <body>
    <form>
      <label for="nickname">Your nickname:</label>
      <input type="text" id="nickname" name="nickname">
      <label for="user-email">Your e-mail:</label>
      <input type="email" id="user-email" name="user-email">
      <label for="content">Content:</label>
      <textarea rows="10" cols="50" id="content"  name="content" ></textarea>
      <input type="submit" value="Add">
    </form>
  </body>
</html>
Our browser displays it as:

It doesn't look nice. In the next chapter we will figure out how to fix it.