HTML Exercise: Coding a Blogpost
Chapter 4
Time for another exercise that will show you the philosophy of writing more advanced websites in HTML5. We'll try to produce the following example as a website, an article on a blog.
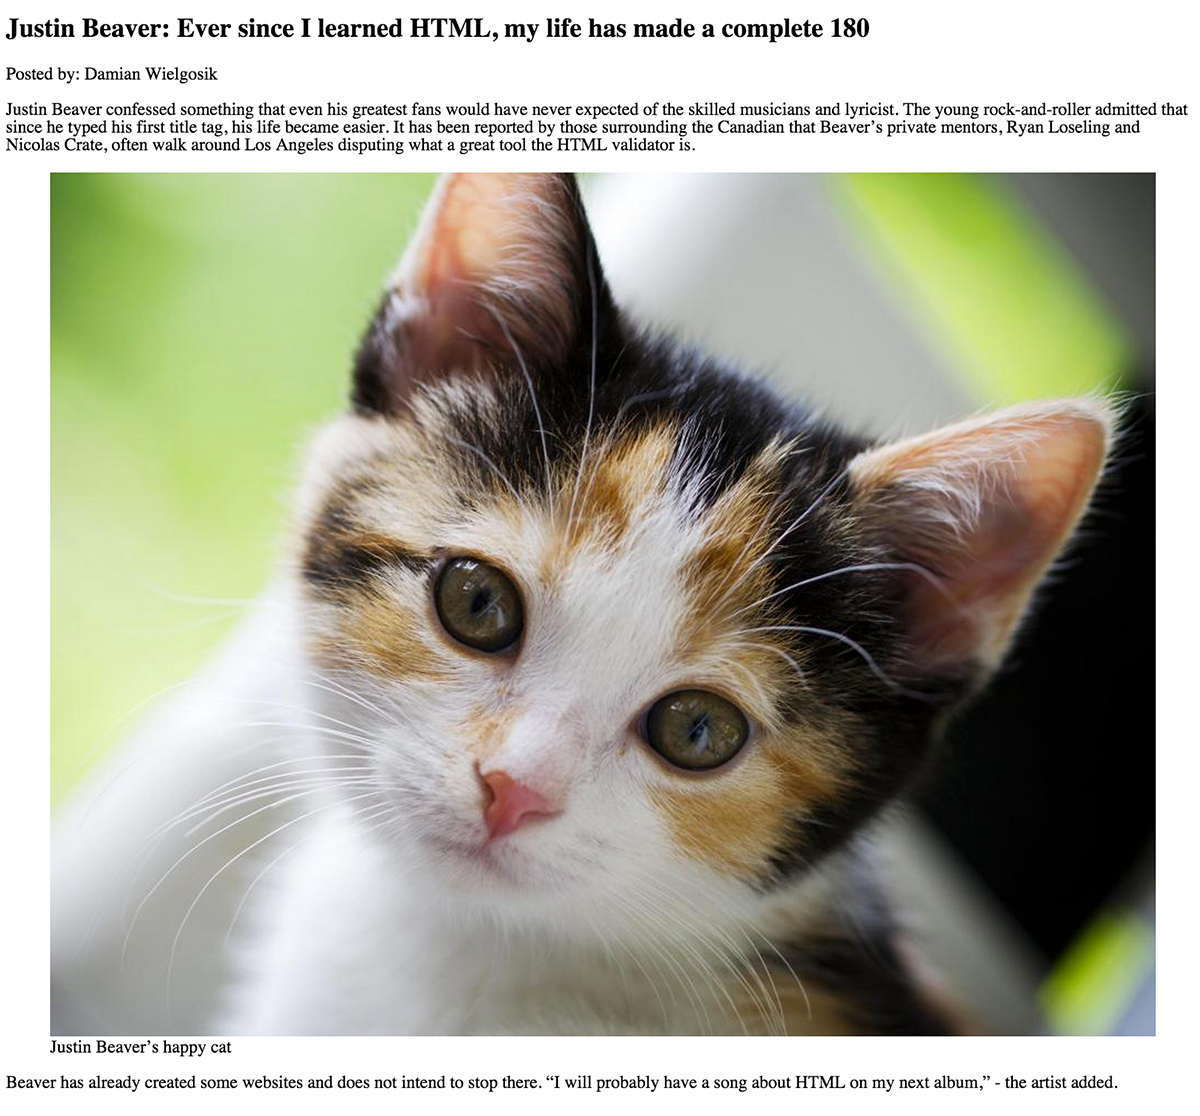
Note that here we have one header for the article. In addition, information about the author, as well as a photo and a "quote" paragraph. It is worth noting that as a front-end web developer, you will often receive graphic designs (like the one shown above) and have to recreate everything in HTML.
Let's begin with the elements which will always be fixed and do not change. As we did earlier, we want the doctype tag, <html>, the <head> and <body>. Note that in our <head> we'll want to make sure we have character encoding for "utf-8" so that we can display special characters on our site.
Our starting template for the code will look like this:
<!DOCTYPE html>
<html lang="en">
  <head>
    <meta charset="utf-8">
  </head>
  <body>
  </body>
</html>
Let's add the title now:
<!DOCTYPE html>
<html lang="en">
  <head>
    <meta charset="utf-8">
    <title>Justin Beaver fascinated by HTML</title>
  </head>
  <body>
  </body>
</html>
At this point, we've finished the template which will now serve as the basis for the contents of the article.
If we save the file as article.html, and then open in a browser, we will see nothing at all because the <body> tag has no content.
We generally start from the most general content, followed by more specific, detailed content as we progress. Let's analyze our pieces:
- In the article, the most important information would probably be the header information which contains the title: "Justin Beaver: Ever since I learned HTML, my life has made a complete 180."
- The next most important information is about the author, "authored by Damian Wielgosik."
- The first paragraph of text comes next, then a place for a photo and its description.
- Finally, the last paragraph, which contains a quote, "I will probably have a song about HTML on my next album".
And those are our pieces. This type of analysis where we look at the pieces helps us visualize how the HTML code will look. The hierarchy starts from the most general element (the parent), and then continues to elements which a parent contains (children), which are more specific, detailed elements.
With this understanding of hierarchy, our information should be organized as follows in the HTML code:
<!DOCTYPE html>
<html lang="en">
  <head>
    <meta charset="utf-8">
    <title>Justin Beaver fascinated by HTML</title>
  </head>
  <body>
    <article>
    </article>
  </body>
</html>
You might have noticed that we used the <article> element which is contained within the <body> parent. Articles consist of a header and content, so all tags representing heading and paragraphs will naturally be children of <article>.
Adding to our list of elements that we've discovered so far, we're going to now use an element that marks headers, the <header> tag.
We can add the <header> code as a child of <article>. As we move from top to bottom in the code (in terms of importance), note that we also move rightwards with indentations to show that an element is lower on the hierarchy than its above component. In the example below, <header> is not only below <article>, but also indented to show where it is on the hierarchy.
<!DOCTYPE html>
<html lang="en">
  <head>
    <meta charset="utf-8">
    <title>Justin Beaver fascinated by HTML</title>
  </head>
  <body>
    <article>
      <header>
      </header>
    </article>
  </body>
</html>
Our header section is now ready, but what should go inside the <header>? Well, we discussed earlier that we have a title and author. We'll use the tag <h1> for the title of the text, and <p> for the author. There is no specific HTML tag for author, so in this case we're using <p> as a general container for a text.
In the code below, we've added <h1> and <p> tags to the header element:
<!DOCTYPE html>
<html lang="en">
  <head>
    <meta charset="utf-8">
    <title>Justin Beaver fascinated by HTML</title>
  </head>
  <body>
    <article>
      <header>
        <h1>Justin Beaver: Ever since I learned HTML, my life has made a complete 180</h1>
        <p>Posted by: Damian Wielgosik</p>
      </header>
    </article>
  </body>
</html>
By the way, you should note that in addition to <h1>, there are lower levels of the HTML headers that look like this:
- <h2>
- <h3>
- <h4>
- <h5>
- <h6>
These elements help to map the logical structure of headings and subheadings. So for example, if we were writing in book format, its title would be contained between the element <h1>. Then, the names of the chapters will be tagged with <h2>, and subsections <h3>.
Note that you shouldn't simply denote a header as <h4> on a whim. Headers must be nested under a higher priority header, so if you have <h4>, <h3> must occur before it, and <h2> must occur before that, and so on.
For example, this book could look like this:
<h1>Simple HTML5</h1>
<h2>My first website</h2>
<h3>W3C Validator</h3>
<h2>Meet CSS</h2>
<h3>Selectors in CSS</h3>
Let's move on to coding the first paragraph of text. We want to avoid nesting the paragraph under the <header>. It makes sense that the paragraph should be part of the <article>. So, we'll add the first <p> within <article>, with the same priority as <header>, but underneath it:
<!DOCTYPE html>
<html lang="en">
  <head>
    <meta charset="utf-8">
    <title>Justin Beaver fascinated by HTML</title>
  </head>
  <body>
    <article>
      <header>
        <h1>Justin Beaver: Ever since I learned HTML, my life has made a complete 180</h1>
        <p>Posted by: Damian Wielgosik</p>
      </header>
      <p>Justin Beaver confessed something that even his greatest fans would have never expected of the skilled musicians and lyricist. The young rock-and-roller admitted that since he typed his first title tag, his life became easier. It has been reported by those surrounding the Canadian that Beaver's private mentors, Ryan Loseling and Nicolas Crate, often walk around Los Angeles disputing what a great tool the HTML validator is.</p>
    </article>
  </body>
</html>
Next we'll add the photo plus a description. For this type of content, and therefore all related to the entire document such as photos, charts or maps, we'll use the <figure> tag. It is worth noting that the <figure> condition of use is important into that you can use the extra element <figcaption>, which puts a description of the image beneath it.
<!DOCTYPE html>
<html lang="en">
  <head>
    <meta charset="utf-8">
    <title>Justin Beaver fascinated by HTML</title>
  </head>
  <body>
    <article>
      <header>
        <h1>Justin Beaver: Ever since I learned HTML, my life has made a complete 180</h1>
        <p>Posted by: Damian Wielgosik</p>
      </header>
      <p>Justin Beaver confessed something that even his greatest fans would have never expected of the skilled musicians and lyricist. The young rock-and-roller admitted that since he typed his first title tag, his life became easier. It has been reported by those surrounding the Canadian that Beaver's private mentors, Ryan Loseling and Nicolas Crate, often walk around Los Angeles disputing what a great tool the HTML validator is.</p>
      <figure>
        <img src="cat.jpg" alt="Justin Beaver's cat is pleased">
        <figcaption>Justin Beaver's happy cat</figcaption>
      </figure>
    </article>
  </body>
</html>
After we've added the image, we just have one more paragraph to add to the article. Note that this paragraph has a quote, "I will probably have a song about HTML on my next album." We can annotate this quote so that our code has a greater semantic value. Perhaps in the future, someone will look for quotes from Justin Beaver, and this designation will help them find the quote faster. Otherwise, search engines would always have to deal with one huge chunk of text.
In order to indicate that a section of text is a quote, we're going to use the <q> tag within the new paragraph:
<!DOCTYPE html>
<html lang="en">
  <head>
    <meta charset="utf-8">
    <title>Justin Beaver fascinated by HTML</title>
  </head>
  <body>
    <article>
      <header>
        <h1>Justin Beaver: Ever since I learned HTML, my life has made a complete 180</h1>
        <p>Posted by: Damian Wielgosik</p>
      </header>
      <p>Justin Beaver confessed something that even his greatest fans would have never expected of the skilled musicians and lyricist. The young rock-and-roller admitted that since he typed his first title tag, his life became easier. It has been reported by those surrounding the Canadian that Beaver's private mentors, Ryan Loseling and Nicolas Crate, often walk around Los Angeles disputing what a great tool the HTML validator is.</p>
      <figure>
        <img src="cat.jpg" alt="Justin Beaver's cat is pleased">
        <figcaption>Justin Beaver's happy cat</figcaption>
      </figure>
      <p>Beaver has already created some websites and does not intend to stop there.
      <q>I will probably have a song about HTML on my next album,</q> - the artist added.
      </p>
    </article>
  </body>
</html>
Now, let's save the code to a file with the extension .html and display it in the browser.
You have now completed your second page. Great! This is another step to becoming a professional web developer.