Rsyslog
Rsyslog 是 RHEL6 开始的默认系统 syslog 应用软件(当然,RHEL 自带的版本较低,实际官方稳定版本已经到 v8 了)。官网地址:http://www.rsyslog.com
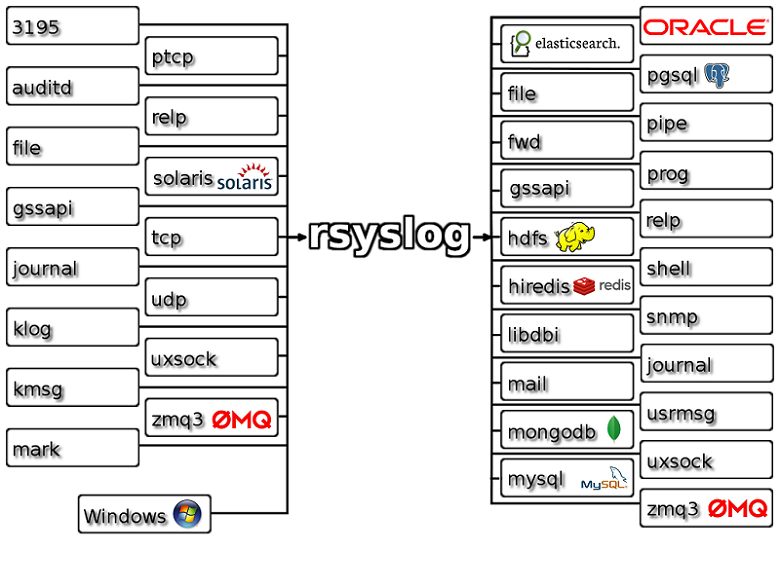
目前 Rsyslog 本身也支持多种输入输出方式,内部逻辑判断和模板处理。

常用模块介绍
不同模块插件在 rsyslog 流程中发挥作用的原理,可以阅读:http://www.rsyslog.com/doc/master/configuration/modules/workflow.html
流程中可以使用 mmnormalize 组件来完成数据的切分(相当于 logstash 的 filters/grok 功能)。
rsyslog 从 v7 版本开始带有 omelasticsearch 插件可以直接写入数据到 elasticsearch 集群,配合 mmnormalize 的使用示例见: http://puppetlabs.com/blog/use-rsyslog-and-elasticsearch-powerful-log-aggregation
而 normalize 语法说明见: http://www.liblognorm.com/files/manual/index.html?sampledatabase.htm
类似的还有 mmjsonparse 组件。
使用示例见:http://blog.sematext.com/2013/05/28/structured-logging-with-rsyslog-and-elasticsearch/
rsyslog 与 logstash 合作
虽然 Rsyslog 很早就支持直接输出数据给 elasticsearch,但如果你使用的是 v8.4 以下的版本,我们这里并不推荐这种方式。因为normalize 语法还是比较简单,只支持时间,字符串,数字,ip 地址等几种。在复杂条件下远比不上完整的正则引擎。
那么,怎么使用 rsyslog 作为日志收集和传输组件,来配合 logstash 工作呢?
如果只是简单的 syslog 数据,直接单个 logstash 运行即可,配置方式见本书 2.4 章节。
如果你运行着一个高负荷运行的 rsyslog 系统,每秒传输的数据远大过单个 logstash 能处理的能力,你可以运行多个 logstash 在多个端口,然后让 rsyslog 做轮训转发(事实上,单个 omfwd 本身的转发能力也有限,所以推荐这种做法):
Ruleset( name="forwardRuleSet" ) {
    Action ( type="mmsequence" mode="instance" from="0" to="4" var="$.seq" )
    if $.seq == "0" then {
        action  (type="omfwd" Target="127.0.0.1" Port="5140" Protocol="tcp" queue.size="150000" queue.dequeuebatchsize="2000" )
    }
    if $.seq == "1" then {
        action  (type="omfwd" Target="127.0.0.1" Port="5141" Protocol="tcp" queue.size="150000" queue.dequeuebatchsize="2000" )
    }
    if $.seq == "2" then {
        action  (type="omfwd" Target="127.0.0.1" Port="5142" Protocol="tcp" queue.size="150000" queue.dequeuebatchsize="2000" )
    }
    if $.seq == "3" then {
        action  (type="omfwd" Target="127.0.0.1" Port="5143" Protocol="tcp" queue.size="150000" queue.dequeuebatchsize="2000" )
    }
}
rsyslog v8 版的 omelasticsearch
如果你使用的是最新的 v8.4 版 rsyslog,其中有一个新加入的 mmexternal 模块。该模块是在 v7 的 omprog 模块基础上发展出来的,可以让你使用任意脚本,接收标准输入,自行处理以后再输出回来,而 rsyslog 接收到这个输出再进行下一步处理,这就解决了前面提到的 “normalize 语法太简单”的问题!
下面是使用 rsyslog 的 mmexternal 和 omelasticsearch 完成 Nginx 访问日志直接解析存储的配置。
rsyslog 配置如下:
module(load="imuxsock" SysSock.RateLimit.Interval="0")
module(load="mmexternal")
module(load="omelasticsearch")
template(name="logstash-index" type="list") {
    constant(value="logstash-")
    property(name="timereported" dateFormat="rfc3339" position.from="1" position.to="4")
    constant(value=".")
    property(name="timereported" dateFormat="rfc3339" position.from="6" position.to="7")
    constant(value=".")
    property(name="timereported" dateFormat="rfc3339" position.from="9" position.to="10")
}
template( name="nginx-log" type="string" string="%msg%\n" )
if ( $syslogfacility-text == 'local6' and $programname startswith 'wb-www-access-' and not ($msg contains '/2/remind/unread_count' or $msg contains '/2/remind/group_unread') ) then
{
    action( type="mmexternal" binary="/usr/local/bin/rsyslog-nginx-elasticsearch.py" interface.input="fulljson" )
    action( type="omelasticsearch"
            template="nginx-log"
            server="eshost.example.com"
            searchIndex="logstash-index"
            searchType="nginxaccess"
            asyncrepl="on"
            bulkmode="on"
            queue.type="linkedlist"
            queue.size="10000"
            queue.dequeuebatchsize="2000"
            dynSearchIndex="on"
    )
    stop
}
其中调用的 python 脚本示例如下:
#! /usr/bin/python
import sys
import json
import datetime

def nginxLog(data):
    hostname = data['hostname']
    logline = data['msg']
    time_local, http_x_up_calling_line_id, request, http_user_agent, staTus, remote_addr, http_x_log_uid, http_referer, request_time, body_bytes_sent, http_x_forwarded_proto, http_x_forwarded_for, request_uid, http_host, http_cookie, upstream_response_time = logline.split('`')
    try:
        upstream_response_time = float(upstream_response_time)
    except:
        upstream_response_time = None

    method, uri, verb = request.split(' ')
    arg = {}
    try:
        url_path, url_args = uri.split('?')
        for args in url_args.split('&'):
            k, v = args.split('=')
            arg[k] = v
    except:
        url_path = uri

    # Why %z do not implement?
    ret = {
        "@timestamp": datetime.datetime.strptime(time_local, ' [%d/%b/%Y:%H:%M:%S +0800]').strftime('%FT%T+0800'),
        "host": hostname,
        "method": method.lstrip('"'),
        "url_path": url_path,
        "url_args": arg,
        "verb": verb.rstrip('"'),
        "http_x_up_calling_line_id": http_x_up_calling_line_id,
        "http_user_agent": http_user_agent,
        "status": int(staTus),
        "remote_addr": remote_addr.strip('[]'),
        "http_x_log_uid": http_x_log_uid,
        "http_referer": http_referer,
        "request_time": float(request_time),
        "body_bytes_sent": int(body_bytes_sent),
        "http_x_forwarded_proto": http_x_forwarded_proto,
        "http_x_forwarded_for": http_x_forwarded_for,
        "request_uid": request_uid,
        "http_host": http_host,
        "http_cookie": http_cookie,
        "upstream_response_time": upstream_response_time
    }
    return ret

def onInit():
    """ Do everything that is needed to initialize processing
    """

def onReceive(msg):
    data = json.loads(msg)
    ret  = nginxLog(data)
    print json.dumps({'msg': ret})

def onExit():
    """ Do everything that is needed to finish processing. This is being called immediately before exiting.
    """
    # most often, nothing to do here

onInit()
keepRunning = 1
while keepRunning == 1:
    msg = sys.stdin.readline()
    if msg:
        msg = msg[:len(msg)-1]
        onReceive(msg)
        sys.stdout.flush()
    else:
        keepRunning = 0
onExit()
sys.stdout.flush()
注意输出的时候,顶层的 key 是不能变的,msg 还得叫 msg,如果是 hostname 还得叫 hostname ,等等。否则,rsyslog 会当做处理无效,直接传递原有数据内容给下一步。
慎用提示
从实际运行效果看,rsyslog 对 mmexternal 的程序没有最大并发数限制!所以如果你发送的数据量较大的事情,rsyslog 并不会像普通的转发模式那样缓冲在磁盘队列上,而是持续 fork 出新的 mmexternal 程序,几千个进程后,你的服务器就挂了!!